To Get The Best National Park Photos, You Need to Be Prepared
We know how important it is to capture your vacation memories. We also know how frustrating it can be to get a photo ‘just-right.’ That’s why we’re teaming up with National Park Patch Lady, Sandra Ramos, for some lessons on how to take better national park photos! Sandra has been featured on our list of Top National Park Instagram Accounts to Follow. Right now you can see her photos on display at an exhibit at the Biscayne National Park Dante Fascell Visitor Center Gallery. Check out our first introduction post and Sandra’s feature below, on how to be prepared to take great national park photos.

When I started out photographing national park sites, I had only been shooting seriously for about three years. Classes at my local camera store, as well as online, were invaluable resources, and essentially taught myself photography via various channels which had a wealth of knowledge from some of the best instructors around. I didn’t have much as far as gear, but I had a camera and knew how to use it, so I was ahead of the game.
Here’s one thing that is always true: the camera doesn’t take the photo, YOU do.
Your eye envisions the shot, your finger presses the shutter release. All this to say, all the gear in the world isn’t going to make you a better photographer – taking the time to learn and practice the art of photography will. Knowing how to use your camera, whether it’s your cellphone or the top of the line DSLR, is the most important thing you can do to improve your photography. A frequent phrase often heard and repeated is, “the best camera is the one you have,” and I believe it wholeheartedly.

Now, having gotten that out of the way, let’s talk about how to take the best photos. As I mentioned in the intro post, there are two types of shots: the snapshot and the photograph.
There is nothing wrong with a snapshot – it’s a way to remember a scene. But to take a photograph – a shot that stands out, tells a story, and has feeling – the following advice may seem unconventional at times, but years of experience, as well as multiple hard drives full of not-Instagram-worthy photos, has brought me to offer these sage words of advice.
In the no-brainer category are the following:
Tripod
The rule of thumb is: handheld shots should be no slower than the shutter speed = the focal length. That means if you are taking a shot with a 70-200mm lens, and your focal length is zoomed all the way out at 200, you should be shooting handheld no slower than 1/200 of a second. Sure, your camera may have amazing image stabilization (also called IS or VR, depending on your camera), but anything slower than that should automatically have you
Aluminum tripods are good, sturdy options and more expensive carbon fiber tripods will be lighter weight and better in very cold climes. Bluntly put, if you’re not using a tripod (even with phone photos!), you’re not really trying to take a photograph.
Extra Batteries
Charged batteries are a must when you’re out for any length of time. Don’t leave them in the car, even if it’s just a short hike. If you’re taking photos when it’s cold, your batteries will run out faster. Don’t miss the shot with a rookie mistake. I speak from experience on this one – more recently than I’d like to admit.
Memory
Whether it’s space on your phone or extra memory cards, don’t skimp! Always carry more than you think you’ll need. You may get out there and decide to record a short video of a waterfall or other special moment, cards can fail, and phones notoriously run out of space (hello photos of your favorite pet!) There is a variety of reasons to carry more than one memory card or make space. In short, always be prepared.

What the Experts Don’t Leave Home without…
So I asked some friends, who are extraordinary photogs that I highly respect, what their most important items were when going out to photograph gorgeous landscapes and National Parks. Here’s what they had to say about it:

Chris Nicholson
My friend Chris Nicholson (IG link: @photographingnationalparks), who literally wrote the book “Photographing National Parks,” and is an amazing photographer and instructor with National Parks at Night, says
“I carry three liters of water with me whenever I’m venturing away from the car. It doesn’t have to be a long hike — most people who get in trouble in the wilderness are folks who went out just for what was supposed to be a couple of hours. So I’m always prepared for even short times out, to be sure I (or we) don’t run into potentially hazardous situations.
For photography, [the most important item] might be my

Brandon Cunningham
For Brandon Cunningham (IG link: @snapjudgementphoto), a mind-blowing travel and storytelling photographer based in Fort Worth, Texas, every excursion begins with dry, warm, comfortable shoes.
“Real photography takes time and patience. You may be walking or standing for hours, and if you’re not comfortable, your images won’t come out as well.
Also, don’t forget the flask!”
Top Tips For Better Landscape Shots…
What does every engaging photograph have? Vision.
Sure, you could be out driving around and suddenly the perfect crepuscular rays appear during sunset gifting you a gorgeous shot. But more often than not, beautiful photographs are not left to chance.

Chris Nicholson puts it this way: “Scout. I can’t say it enough: scout, scout, scout. Don’t just show up and expect you’ll be able to shoot the place like an expert when you don’t know anything about the location. Before you go, read about the park. Look at photos. Ask people who have been there before. Once you get to the park, drive around, then walk around, to get to know the place. Make notes about the spots you visit, including what kind of light, what time of day, what type of weather you think would be best to shoot them in.
“Make a plan for shooting your best ideas, and follow through on it. That doesn’t mean you can’t be serendipitous. If you see, for example, a heard of elk in a misty meadow in beautiful morning light, then by all means abandon your plan and photograph them instead. But having a plan and knowing something about your shoot locations will go a long way toward making your shoot — and the time you’re investing in being in the park — immeasurably better.” I couldn’t have said it more concisely.
Speaking of morning light, there is a reason many of the prettiest photos you see are at sunrise or sunset. Those times, hands down, have the best light. No one goes out at high noon and says “wow, this amazing light is perfect for (insert a shot here).” Unless you’re one of the lucky few to have a gorgeous park in your backyard, you probably spent some time and money to be here, so make it count and get up early before sunrise and stay out late after sunset. (Bonus: there are usually fewer people out at these times!)
Spend your day scouting, but get out of your usual schedule and comfort zone, pack a sandwich, fill the thermos with your favorite caffeinated beverage, and make great photos early and late!

The only thing I might add to this would be to use (gear alert!) a circular polarizing filter (CPL). This indispensable (and usually inexpensive!) item is something I use All. The. Time.
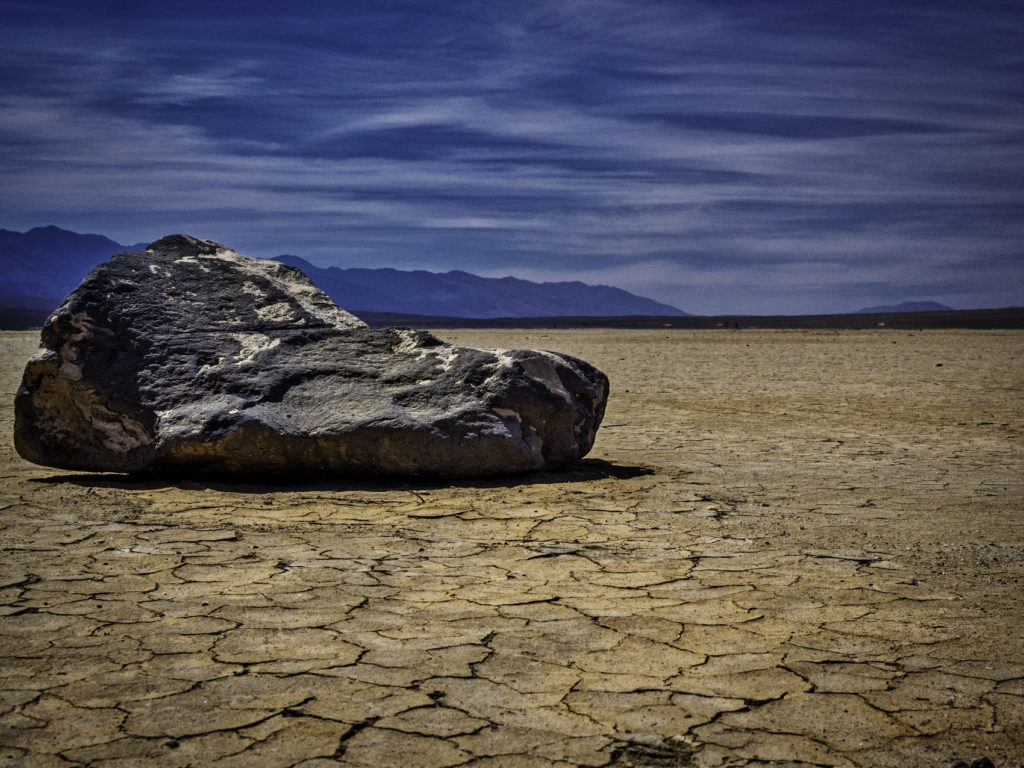
What is this magical device? Just like wearing polarizing sunglasses, a CPL counteracts reflective light – which in turn makes blue skies bluer, green leaves lusher, and water reflection-free and beautiful. It also slows down your shutter speed (since less light is reaching your sensor), so tripods are useful when using this super handy device. Both the Death Valley and John Day Fossil Bed photos included above were shot using a circular polarizing filter.
What You Don’t Know…
The first stop at a National Park site should be to the Visitor Center and get your stamp and collectables out of the way (priorities!) But while you’re there, the most important person to your photography is waiting – a Park Ranger. These flat-hat-wearing heroes are a wealth of information just waiting to fill you with the inspiration you’ve driven hours for.
Those of you who know me, know the first question that pops out when I see a Ranger is: “What is your favorite part of the park?”
The question is phrased this way because it’s objective and who knows the secrets of the park better than the person(s) entrusted to care for it?
Chris Nicholson agrees: “Every ranger I’ve ever spoken with has been more than willing to help with whatever I need. So if I’m in a park that’s new to me and I need some advice on where to find, say, wildflowers or wildlife, I just ask a ranger. Even better if I can find a ranger who’s into photography. These are the people who know the park the best, and they want to help you best experience the park in the way you’re there to do.”
While we’re on the topic of not knowing, it’s ok to not see everything in the first visit.
Brandon Cunningham explains: “Have patience. You’re experimenting and learning while you’re shooting. Take the [iconic] shot, but then play with your scene. You can list 30 things about patience, but it’s important. If you don’t get the shot, you can always go back another time to create your vision.”

“Shooting less means getting more,” Nicholson included. “In my 20s, I’d keep moving constantly, finding new things to shoot, thinking that I was maximizing the time by creating as many opportunities as possible. But with experience, I learned that slowing down is better for both creativity and productivity. Taking time to work a scene, returning in
Find These National Park Photographers Online:
You can follow the photographers I’ve mentioned above:
Chris Nicholson
www.photographingnationalparks.com
www.nationalparksatnight.com
@photographingnationalparks
Brandon Cunningham
@snapjudgementphoto

About Sandra Ramos
Sandra Ramos, also known as the National Park Patch Lady on your local social media channels, is a seeker, avid
Like what you’ve seen so far in our series on taking better national park photos? Subscribe to get all of Sandra’s posts delivered right to your inbox!
Note: Some of the links above are affiliate links. A portion of purchases from these and other items from Amazon.com support this site. To see our full disclosure statement, click here. We appreciate your support and rely on it to continue our Park Chasing adventures!
Share this:
- Click to share on Facebook (Opens in new window)
- Click to share on Pinterest (Opens in new window)
- Click to share on Twitter (Opens in new window)
- More
- Click to share on LinkedIn (Opens in new window)
- Click to share on Tumblr (Opens in new window)
- Click to share on Pocket (Opens in new window)
- Click to share on Reddit (Opens in new window)
- Click to email a link to a friend (Opens in new window)
- Click to print (Opens in new window)
- Click to share on WhatsApp (Opens in new window)


1 thought on “How To Take Better National Park Photos Part II:”
Pingback: How To Take Better National Park Photos, Part III: Half the Park is After Dark - Park Chasers